


15-Jul-2026
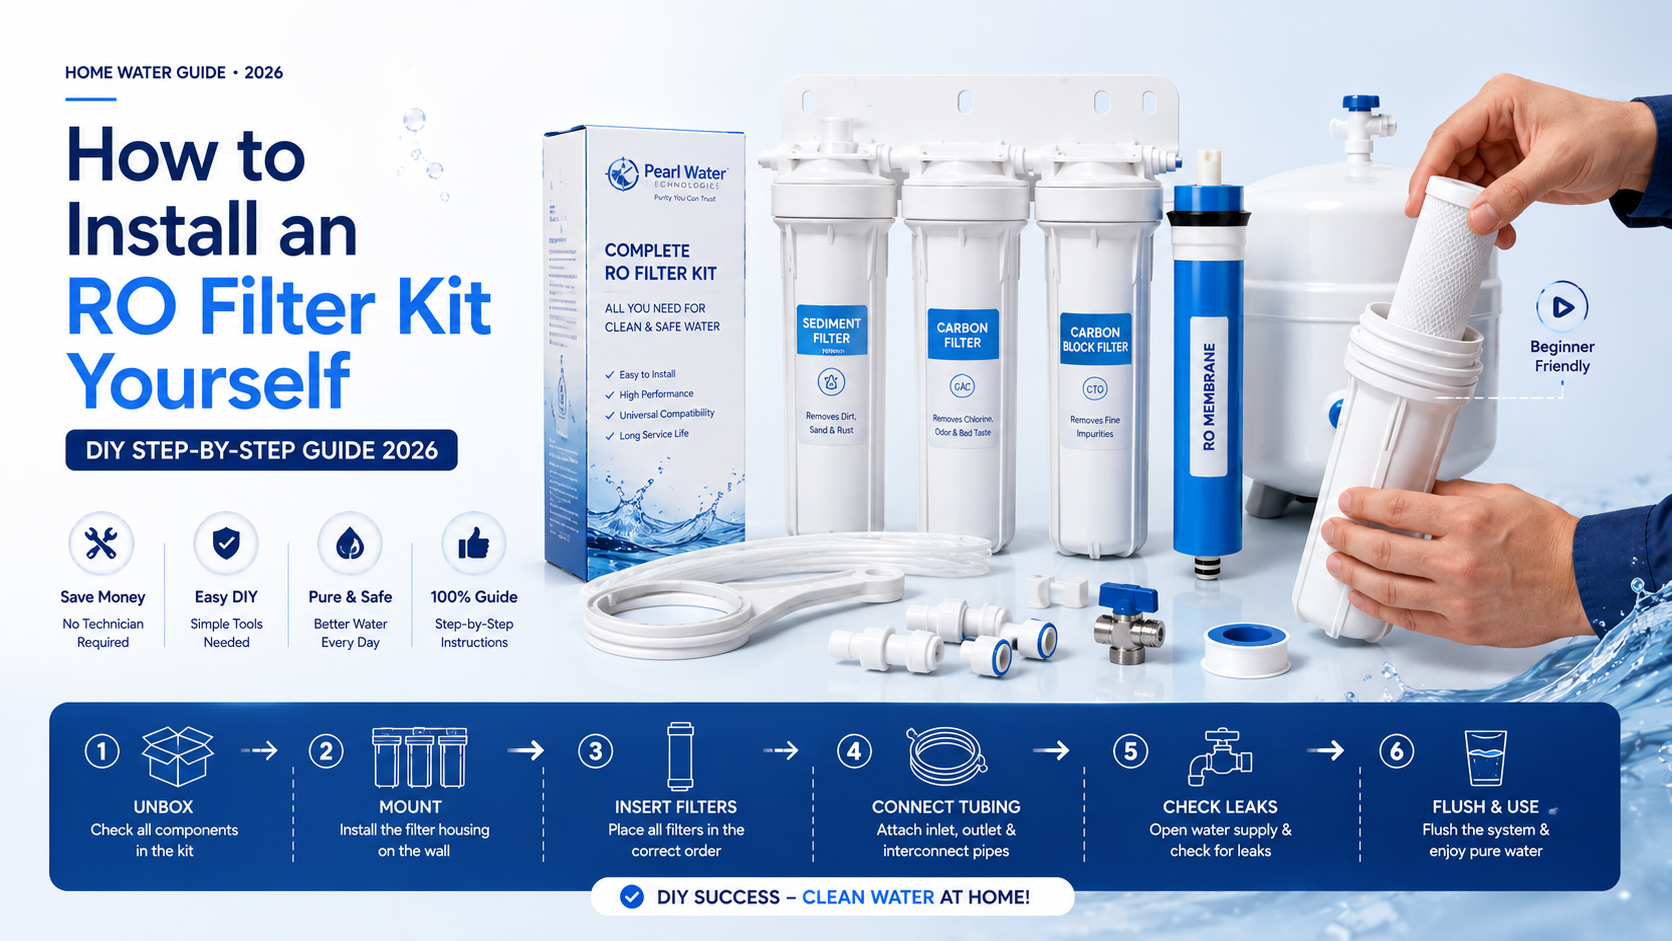
Installing an RO filter kit yourself takes 20–30 minutes and needs no plumbing expertise — just a multi-spanner, Teflon tape, and the correct filter sequence: sediment filter → carbon filter → RO membrane → post-carbon filter. Most homeowners save Rs.300–Rs.600 in technician visit charges by doing it themselves, and the process is the same across Kent, Aquaguard, Livpure, Pureit, and other major brands using standard 10-inch housings.
If you've ever paid a technician Rs.300–Rs.500 just to swap out a filter that takes them five minutes to change, you already know the real cost isn't the filter — it's the visit. The good news: installing or replacing an RO filter kit yourself is far simpler than it looks once you understand the sequence. This guide walks through the exact steps, tools, and mistakes to avoid.
For most routine filter replacements — swapping a sediment filter, carbon filter, or even the RO membrane — the answer is no. These are designed as quick-fit, twist-lock cartridges specifically so users can replace them without tools beyond a basic spanner. A complete RO filter kit typically includes everything you need in one box: filters, housing, connectors, a flow restrictor, and Teflon tape.
Where a professional genuinely helps: if you're installing an RO system for the very first time (not replacing filters in an existing one), dealing with unusual plumbing, or troubleshooting a leak that persists after reinstallation. For those cases, Pearl Water's RO service team can handle it end-to-end.
Item |
Purpose |
|---|---|
Multi-spanner / filter wrench |
Loosening and tightening filter housings |
Teflon tape (PTFE tape) |
Sealing pipe threads to prevent leaks |
New filter kit (sediment, carbon, membrane, cartridge) |
The actual replacement components |
A bucket or towel |
Catching residual water during filter swap |
TDS meter (optional but recommended) |
Verifying purification performance after install |
Most of these — including the spanner and Teflon tape — are already bundled inside a standard complete RO filter kit, so in most cases you won't need to buy anything separately.
Step 1: Turn Off the Water Supply and Power
Switch off the inlet water valve feeding your RO purifier, then unplug the unit from the power socket. This isn't optional — working on a pressurized, powered system is how most DIY leaks and minor shocks happen. Open the purifier's dispensing tap briefly to release any residual pressure in the system.
Step 2: Open the Purifier Housing
Remove the outer cover or casing of your RO unit to access the filter housings. Most domestic purifiers use simple clip or screw fasteners here — no specialized tools needed.
Step 3: Remove the Old Sediment Filter
Using the multi-spanner, twist the first-stage housing counter-clockwise to loosen it. This houses the sediment filter — the one responsible for trapping dirt, rust, and sand before water reaches the carbon stage. Pull out the old cartridge and set it aside for disposal.
Before inserting the new one: rinse the housing itself with clean water to clear out any accumulated sediment residue, then insert the new sediment filter, aligning it straight into the housing so it seats fully.
Step 4: Replace the Carbon Filter (Pre-Carbon Stage)
Repeat the same process for the second housing, which contains the pre-carbon filter. This stage removes chlorine and odour before water reaches the RO membrane — critical, since unfiltered chlorine can damage the membrane over time. Twist out the old cartridge, insert the new one, and hand-tighten the housing until snug (avoid over-tightening, which can crack the housing or damage the O-ring seal).
Step 5: Install or Replace the RO Membrane
The RO membrane sits in a longer housing, usually the largest cartridge in the system. Unscrew the membrane housing cap, slide out the old membrane, and insert the new one — make sure the O-rings on the membrane end align properly with the housing to prevent leaks. Reattach the inlet and outlet tubing exactly as they were connected before (most systems use color-coded or size-differentiated tubing to prevent incorrect connections).
Step 6: Replace the Post-Carbon Filter (If Applicable)
If your system includes a post-carbon or inline cartridge filter stage — which "polishes" water just before it reaches the storage tank — replace it the same way as the earlier cartridges. This is often the smallest inline filter, positioned closer to the tank or tap.
Step 7: Reconnect Tubing and Check Fittings
Before closing the housing, wrap Teflon tape around any threaded connections that showed signs of previous leakage or looseness. Reconnect all tubing to their original positions — a loose or swapped connection here is the most common cause of DIY installation leaks.
Step 8: Turn the Water Supply Back On and Check for Leaks
Slowly reopen the inlet water valve. Watch each housing and connection point closely for the first 2–3 minutes — most leaks show up immediately as a slow drip at a fitting, not a sudden burst. If you spot one, turn off the water, drain pressure, and re-tighten that specific joint (usually the fix is simply that a housing wasn't fully seated).
Step 9: Flush the System Before First Use
Once everything's sealed and leak-free, plug the unit back in and let it run for 10–15 minutes, discarding the first tank of purified water rather than drinking it. New filters and membranes release minor manufacturing residue on first use — flushing this out before drinking is standard practice recommended by every major RO manufacturer, not just Pearl Water.
Step 10: Test Your Water Quality
Use a TDS meter to confirm the purifier is functioning correctly. A properly installed RO membrane should show a significant TDS reduction compared to your input tap water — if the numbers look off, double-check that the membrane is seated correctly and that tubing wasn't accidentally reversed.
How Often Should You Reinstall or Replace Each Component?
Component |
Typical Replacement Interval |
|---|---|
Sediment Filter |
Every 6 months |
Carbon Filter (Pre & Post) |
Every 6–9 months |
RO Membrane |
Every 12–24 months |
Cartridge Filter |
Every 6–9 months |
If you're unsure which stage is due, our carbon filter buying guide covers the signs and replacement schedule in detail specifically for the carbon stage.
Is it safe to install an RO filter kit myself? Yes. RO filter kits are specifically engineered with quick-fit, twist-lock housings so homeowners can replace filters without professional plumbing skills. The main safety step is switching off the water supply and power before starting.
How long does DIY RO filter kit installation take? For an experienced user, 15–20 minutes. For a first-time installer, budget 30–45 minutes, mainly to double-check each connection before turning the water back on.
What happens if I install the filters in the wrong order? Water quality drops significantly. The sediment filter must come first to protect the carbon filter, which must come before the RO membrane to protect it from chlorine damage. Installing them out of order shortens the lifespan of downstream components.
Do I need to flush the system after installing new filters? Yes, always. Run the purifier for 10–15 minutes and discard the first tank of water — new filters and membranes can release trace manufacturing residue that should be flushed out before drinking.
Can I use a filter kit from a different brand than my purifier? In most cases, yes. Standard 10-inch cartridge filters with universal quick-fit connectors are compatible across Kent, Aquaguard, Livpure, Pureit, and other major brands, as long as your housing size matches.
What if I still have a leak after reinstalling everything? Check that the housing is fully screwed in (not cross-threaded) and that Teflon tape is wrapped correctly on threaded joints. If the leak persists after re-tightening, the O-ring may be damaged and need replacement. If you're not confident resolving it, Pearl Water's RO service team can help.
Pearl Water Technologies has manufactured water treatment products in India since 2010, with ISO 9001:2015 certification and every batch tested before dispatch. Our filter kits are built specifically for easy self-installation — food-grade plastic housings, standard quick-fit connectors, and included accessories (spanner, Teflon tape, flow restrictor) so you have everything needed in one box, compatible with Kent, Aquaguard, Livpure, Pureit, and other major domestic RO brands.
Shop Complete RO Filter Kits →
Not confident about DIY installation, or dealing with a persistent leak? Contact Pearl Water Technologies or book our RO service for professional installation.
Leave A Comment